Personal tools

|
Managing Data
Back to OMERO.insight,
Once successfully logged in, the default view of the Data Manager will pop up on screen. The Data Manager serves as the major portal for the user into his/her data hierarchies. 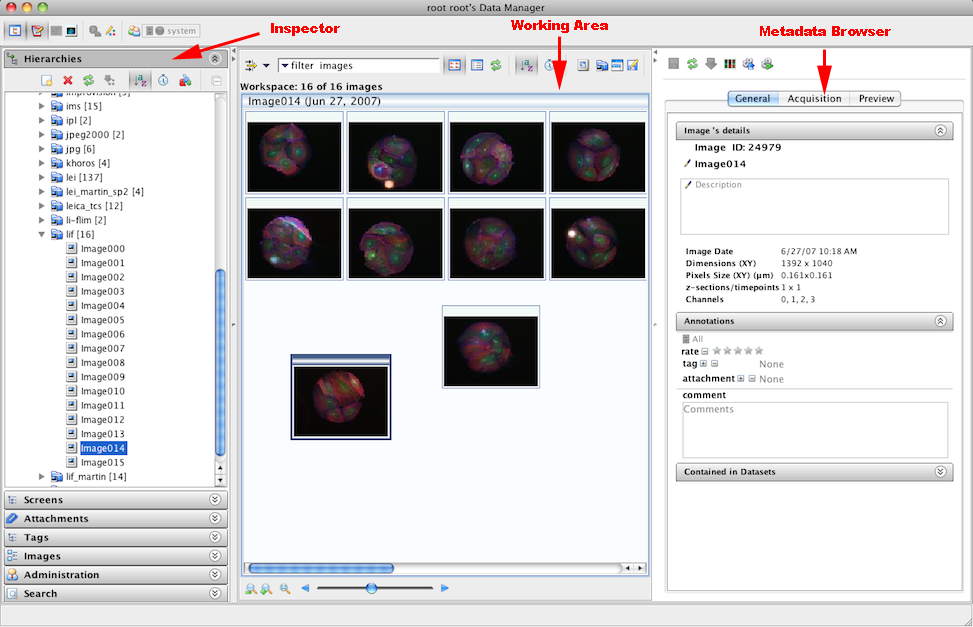
Create Objects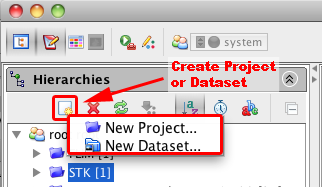
To create a new Project (resp. Dataset),
The following window will pop up on screen 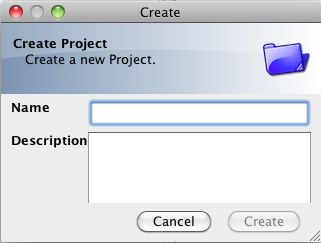
After pressing the To add a new Dataset to the Project
To create:
Manage
Using the Inspector, the user can
Same options are available for Plate, Screen, Tag Set and Tag. Working AreaThe Working area is built and displayed when browsing data e.g. a Plate 
Working Area tool bar explained 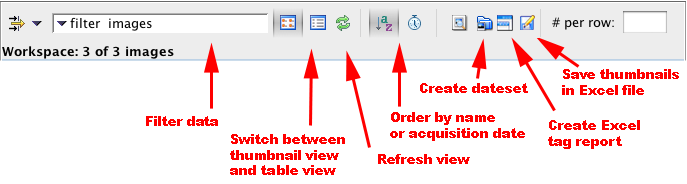
The user can then filter the displayed images. 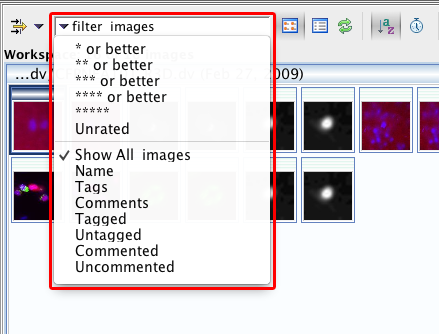
Handle Metadata and Edit ObjectOMERO offers the option to handle various types of annotation.
How to add, view metadata
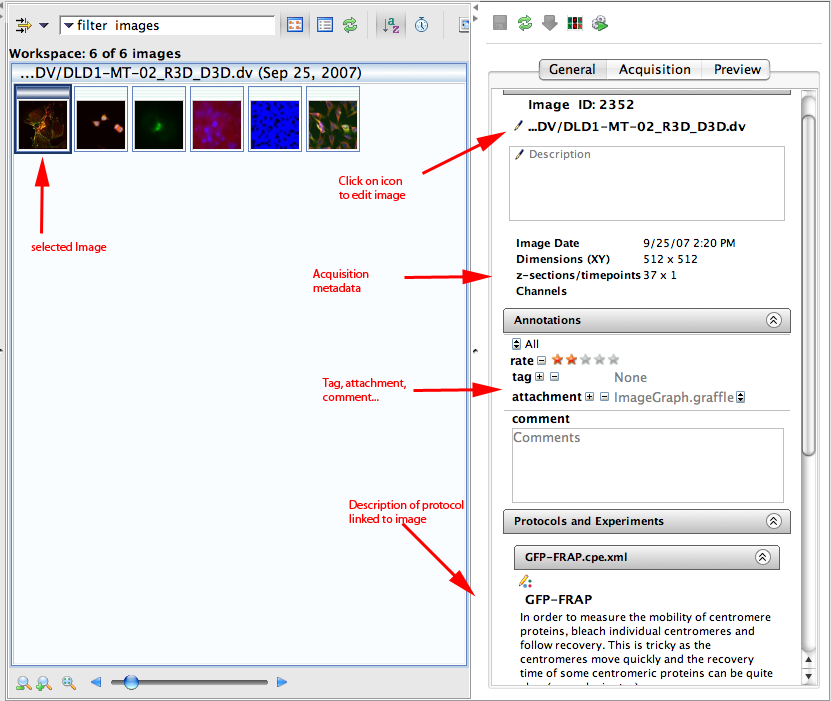
Managing Image AttachmentsAttachments can be downloaded, viewed, and deleted by clicking the double arrow beside each one. Note that unlinking an attachment from an image will remove the link between the two, but will NOT delete the attachment from the server. 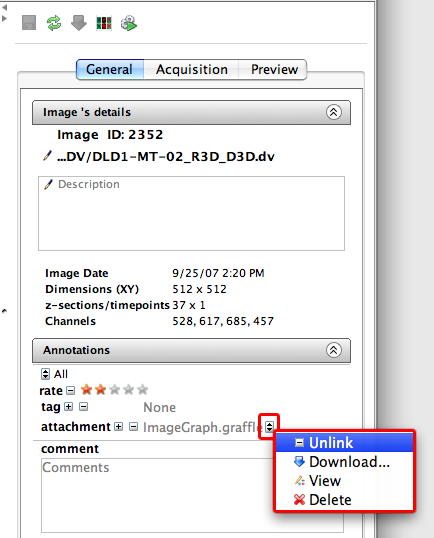
View Acquisition MetadataThe acquisition metadata read at import is displayed in the Right-hand panel under the Acquisition tab. 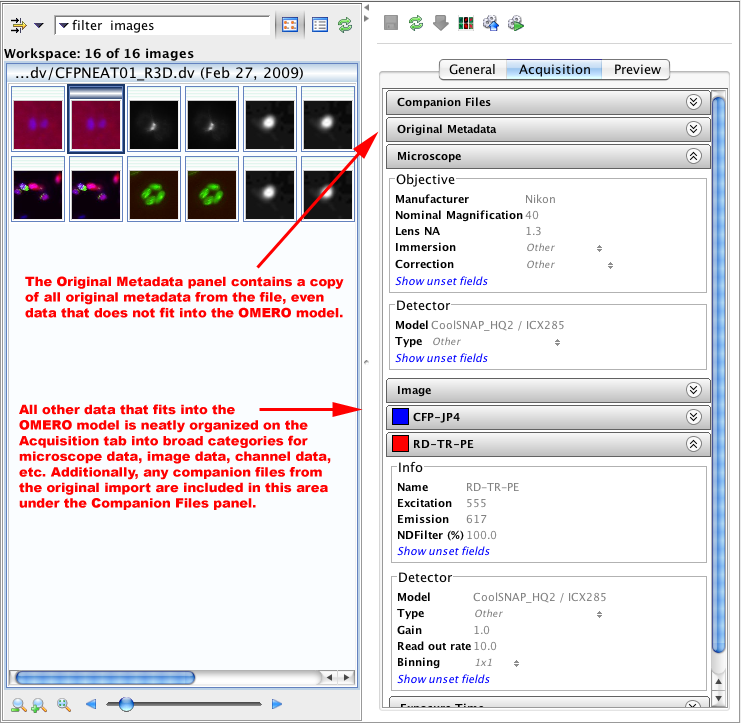
Image PreviewThe Preview tab on the Right-hand panel provides a mini preview window of your image and allows you to tune some of the rendering settings without having to launch the full image viewer. 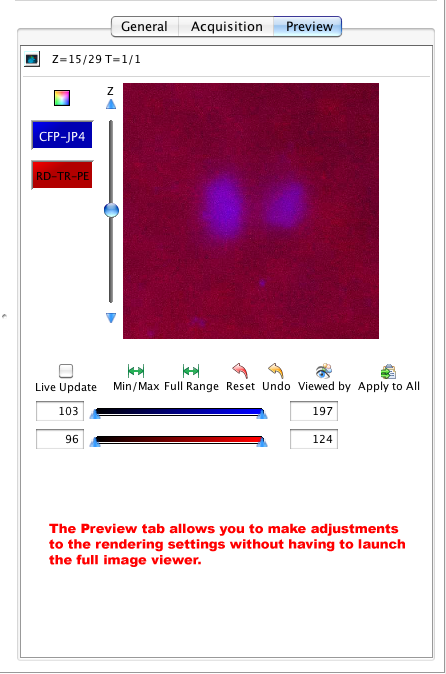
SearchFull text searching. You can also use wild-cards in your search e.g. *.dv will find all files ending with '.dv'. 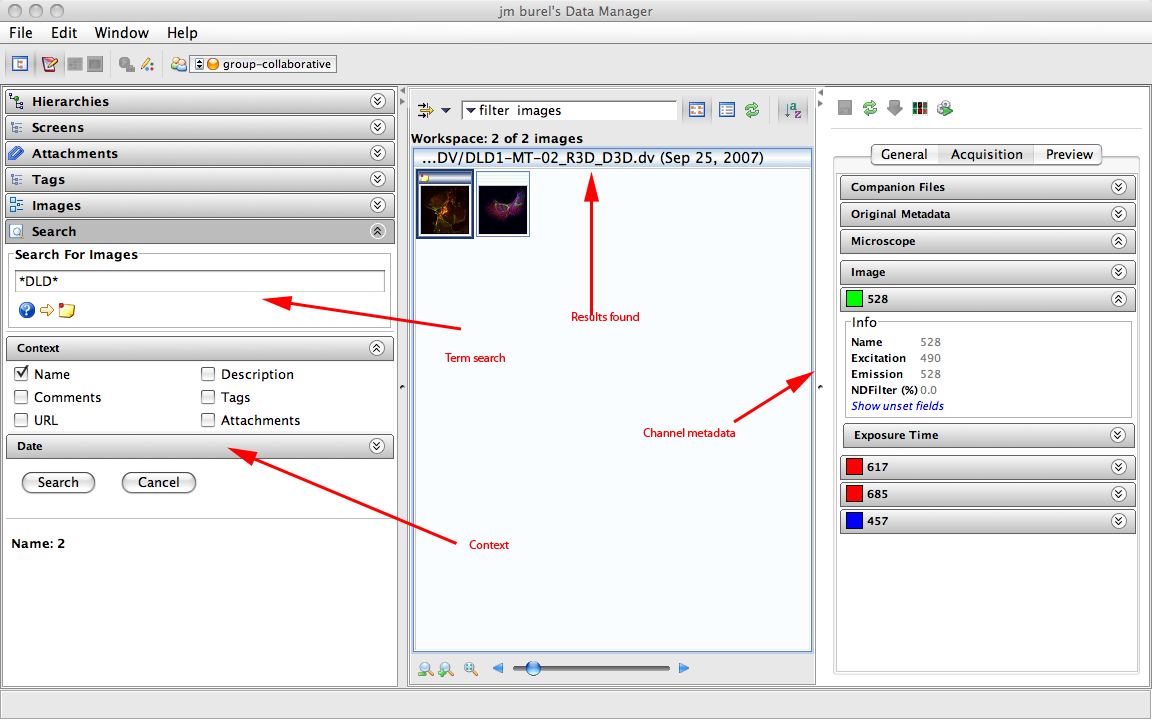
Document Actions |
 This section is documentation for an OLD release of our software!
 icon.
icon.
 icon.
icon.
 icon next to the name.
