 This section is documentation for an OLD release of our software!
Viewing Images
Launch a Viewer
-
From the Data Manager or Working Area, select an image and click on the
 icon.
icon.
- From the Data Manager or Working Area, double-click on the image.
Note that you can have multiple viewers opened at the time.
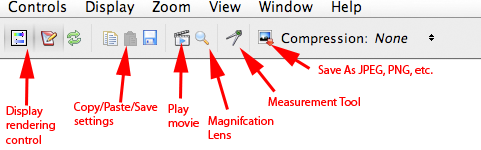
Tool Bar explained
The Image View tab is the default view.
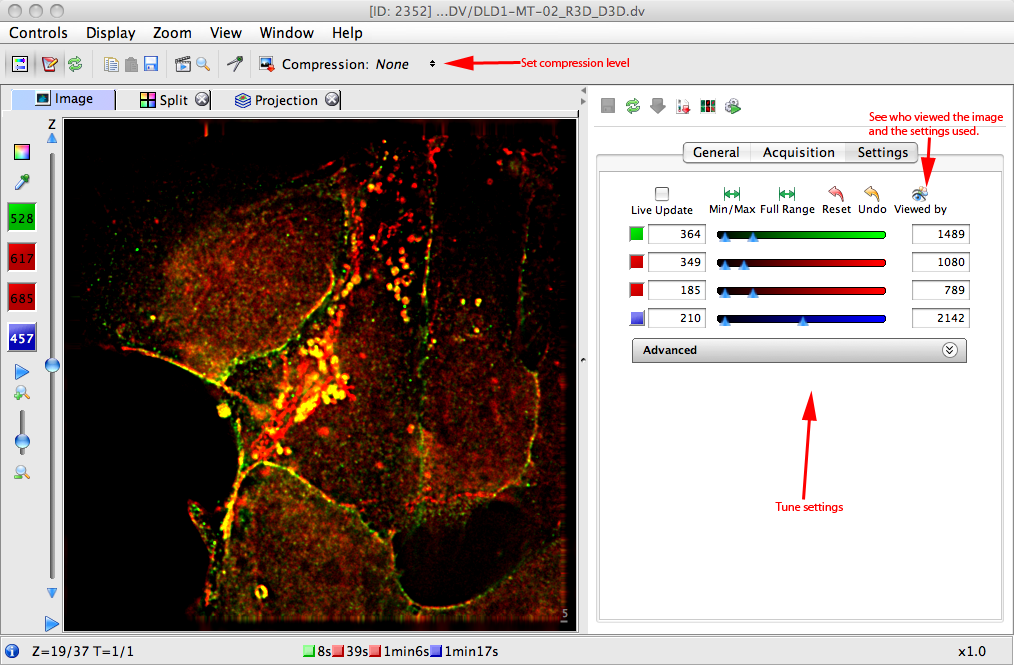
To modify the rendering settings:
-
Click on on the
 icon.
icon.
-
Then go the panel displayed on the Right-hand side of the image (see image below) to
- modify the interval value
- modify the mapping, bit resolution, etc.
- reset some settings
- view if other users have viewed the image and view how the settings they used
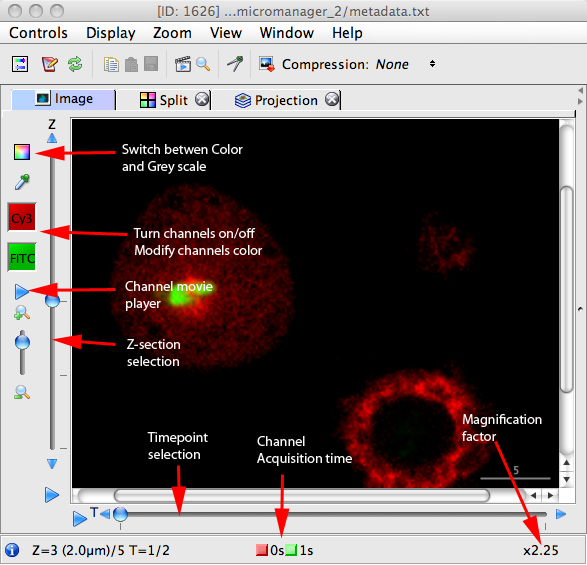
To modify Z-section, Time, Channels Exploration, Color control etc, see below
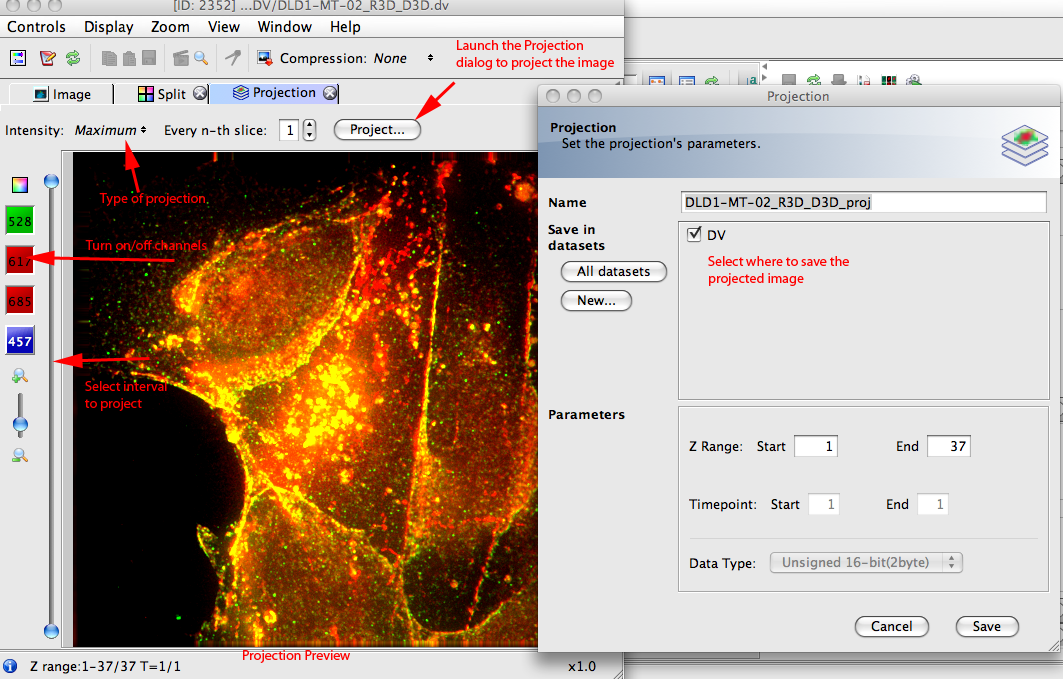
Projection View
If you image has several z-sections, to project the image, go to the Projection View tab.
- select the type of projection i.e. maximum or minimum intensity
- The interval to project.
- The number of z-sections to project within the interval.
- Option to tune the previewed image before creation
- Preview the result before creating the projected image.
-
Click on the
Project...button for setting final settings.
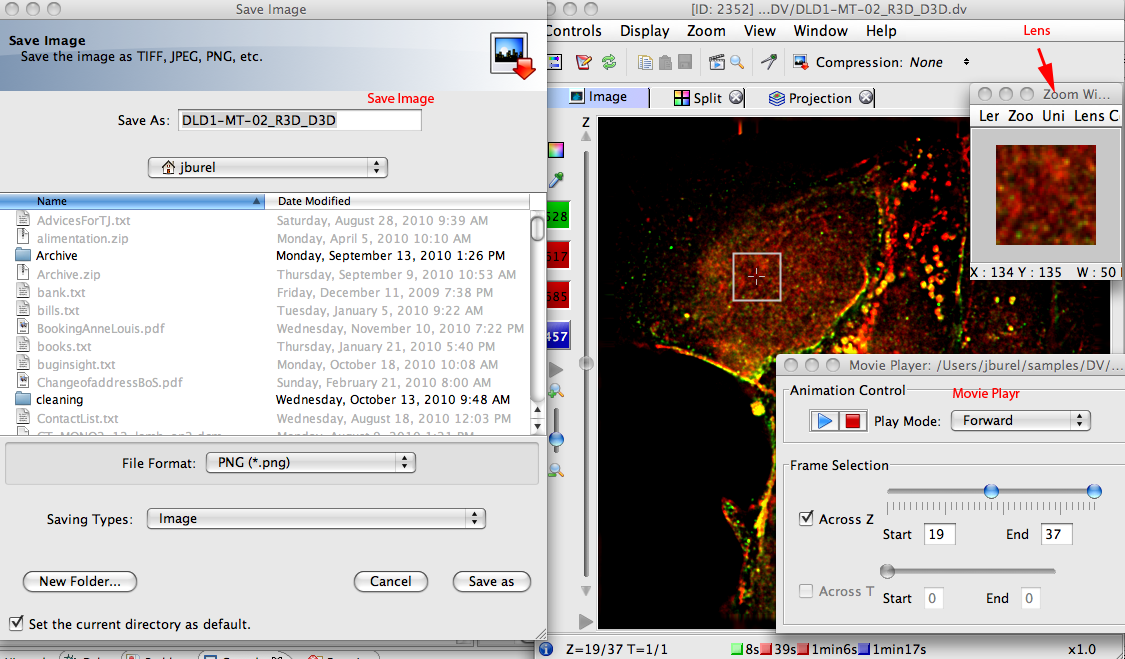
Magnify Area of image, movie player, save image.
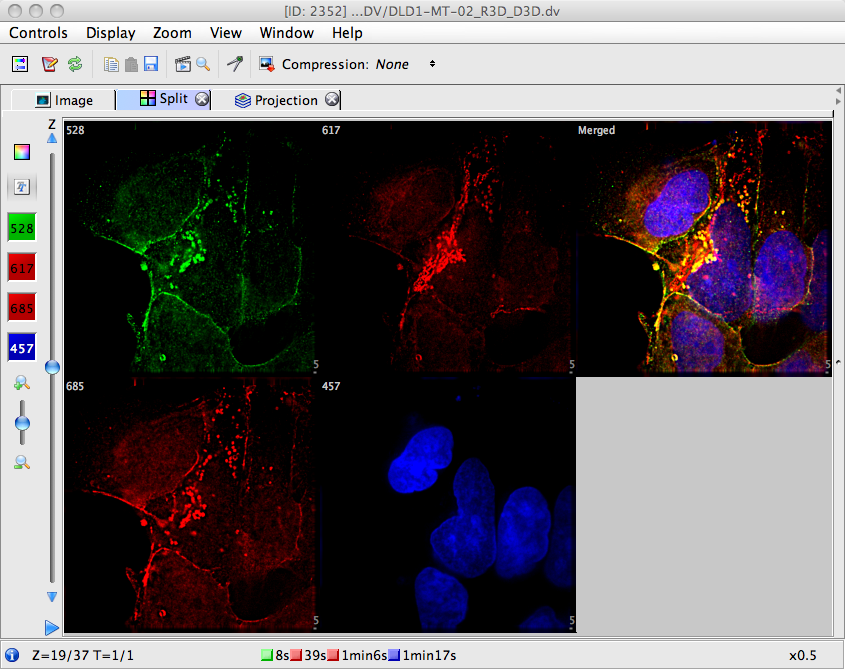
Split View
The Split View allows the user to see each channel as a separate image. It is possible to:
- Turn channels on/off.
- Select z-section and time-point.
- Switch between color model and grey scale.
- etc.