
 This section is documentation for an OLD release of our software!
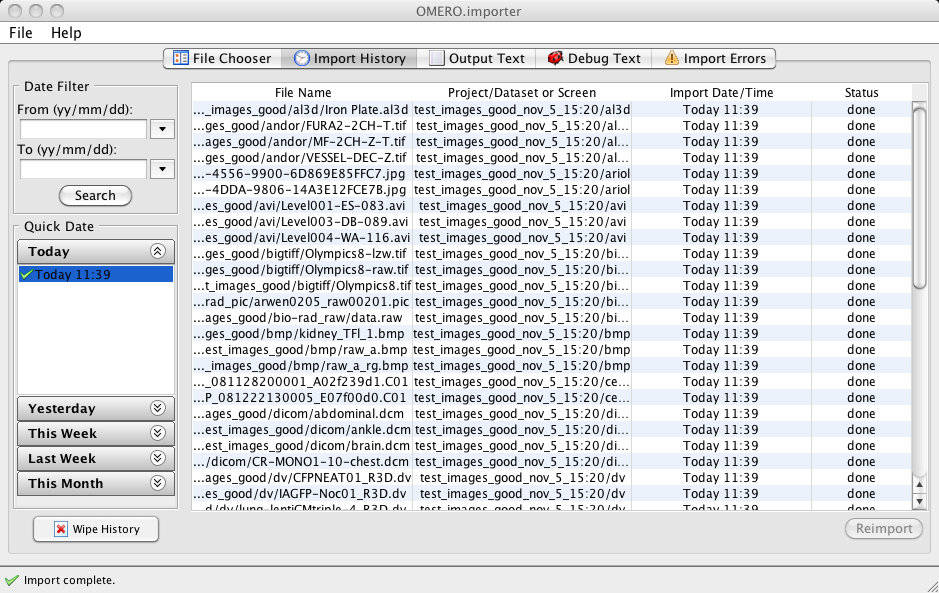
Import History
OMERO.importer includes a feature to record your import history, saving this information on the OMERO.server you are connected to. This feature allows you to import files, and then later on review and re-import those same files if necessary. This is especially helpful if you are queuing and running an import at one location (for example, at work) and want to later review the status of your running import from somewhere else (for example, at home). You can also use this feature as record of what files you have imported, to discover which files have failed to import so you can retry them later.
Pre-requisites
Because the importer's history information is stored server-side, you must first have the OMERO.tables extension working on your connected OMERO.server, and if this feature is not installed, your importer's History tab (along the top) will be grayed out.
Instructions for how to enable this feature can be found at the OMERO.tables page.
Using the History Feature
The importer History tab is divided into two general areas:
- The left hand 'side' panel allows you to search for your imports by date.
- The right hand 'main' panel displays the results of your search.
The Date Filter allows you to search for imports between a given date range, which you can either enter manually using the YY/MM/DD format, or by using the calender pop-up available by pressing the down arrow button. After you have selected a date range, hitting the 'Search' button will display all imports between those dates.
The Quick Date area allows you to quickly find imports for some of the more common date ranges such as 'Today', 'Yesterday', 'Last Week', etc. The list of imports under these tables will also show you the general status of that import with an icon: a green check mark indicates a fully successful import, whereas a yellow alert icon indicates one or more failed files in your imported file set. Selecting any of these import sets will automatically populate the right hand search results table with the files from that import session.
Re-Importing Your Images
Once you have filtered your import set by date and populated the right hand search results table, you can re-import any of the files displayed by clicking on that file and clicking the 'Reimport' button at the bottom of the window. Multi-selecting files on this list can be done using the standard method for your operating system (most typically the 'Shift' and 'Control' keys).
