
 This section is documentation for an OLD release of our software!
Importing Images
To get the list of file formats currently supported in OMERO, go to Supported Formats.
In order to import images into an OMERO server, you need to:
- Launch the OMERO.importer application.
- Connect to the server (see Getting Started).
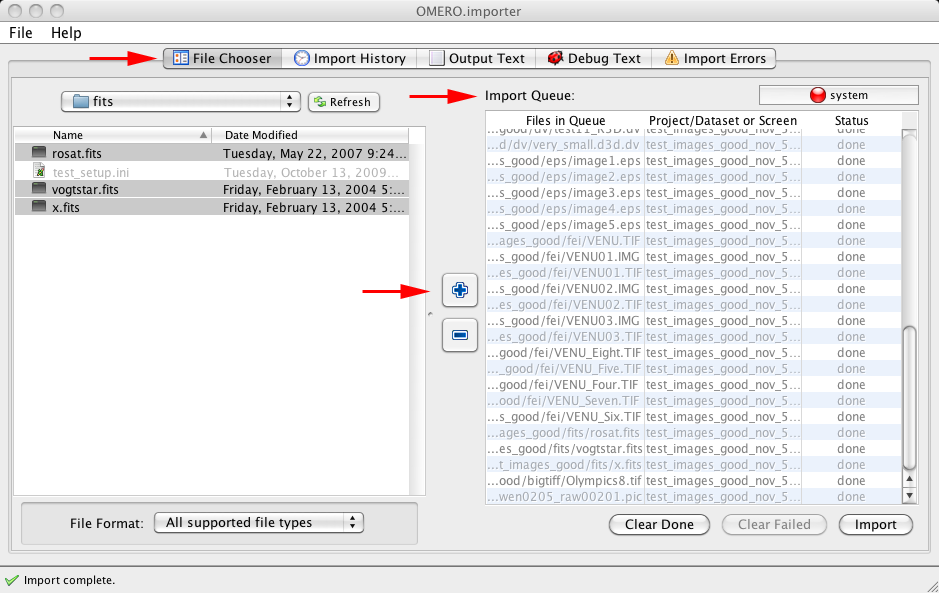
To import images:
- User the File Chooser panel to browser and select the images.
-
Add the selected images to the Import Queue by pressing the
 icon.
icon.
-
The
Importwindow pops up (see below).
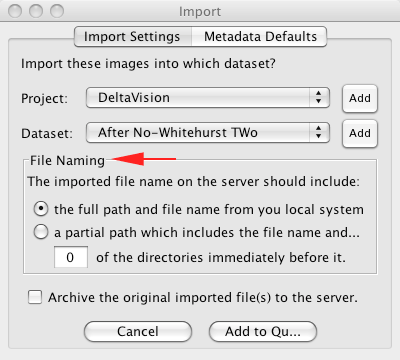
Where and How
Select or Add a project and dataset where to import the images.
The File Naming section allows to select the name of the imported images
-
short version e.g.
myImage.tiff -
full version e.g.
C:importantWork/stuff/myImage.tiff -
customised version i.e. the short version plus a number of leading directories e.g.
stuff/myImage.tiff
-
short version e.g.
Press the
Add to Queuebutton.
Import
Once you have finished selecting images, press the Import button. You can view the progress in the Status column of the Import Queue.
