
 This section is documentation for an OLD release of our software!
Install
OMERO.server Installation for UNIX Based Platforms (including Mac OS X)
- If you are upgrading your OMERO.server installation you want to follow instructions on the upgrade page.
- If you are attempting a Microsoft Windows install please see the Microsoft Windows install page.
- Additional walkthoughs for Mac using MacPorts on Mac OS X 10.6 or manual downloads on Mac OS X 10.5 may be of use to less experienced users.
-
Janek Claus and Kenneth Arcieri (NIH/NICHD/UCSS) have provided this guide (pdf) for users wishing to install OMERO 4.1 on Mac OS 10.6, including details on how to build all dependencies from source. The OMERO 4.2 install is almost identical to 4.1 (except for web client), so this guide will still be useful.
- Caterina Strambio De Castillia and Vanni Galli (University of Geneva/SUPSI in Lugano) have provided this guide (pdf) for users wishing to install OMERO 4.1.1 or 4.2.0 on CentOS.
Installation will require a "root" level account for which you know the password. If you are unsure of what it means to have a "root" level account, or if you are generally having issues with the various users/passwords described in this install guide, please see "Which password do I use where?" under "Troubleshooting".
Prerequisites
NOTE: The installation of these prerequisite applications is outside the scope of this document. For Linux distributions you should use the default package manage. For Mac OS X there are additional notes for Mac OS X 10.5 and MacPorts on Mac OS X 10.6 for less experienced users.
The following are necessary:
PostgreSQL 8.3 or higher installed and configured with PL/pgSQL and to accept TCP connections. 8.2 may work but is not recommended: see Software Limitations. 8.4 has significantly increased security settings and can be difficult for beginners. We suggest using 8.3. See OMERO and PostreSQL for instructions.
Java 1.5 SE Development Kit (JDK) or higher installed http://java.sun.com/javase/downloads/index.jsp
#!sh # You can check which version of Java is currently available # to you via your $PATH as follows... $ which java /usr/bin/java $ java -version java version "1.6.0" Java(TM) SE Runtime Environment (build 1.6.0-b105) Java HotSpot(TM) Server VM (build 1.6.0-b105, mixed mode) # Further, you can see if you have the Java compiler (Java SDK) # installed and available via your $PATH as follows... $ which javac /usr/bin/javac $ javac -version javac 1.6.0- On systems with OpenJDK installed by default, it will be necessary to unselect it and select the Sun version. See this thread for more information.
Ice 3.3.x installed
UNIX source downloads and binary packages are available from ZeroC. The latest compatible distribution is the 3.3.1 release. ZeroC does not provide binaries which work out of the box for Snow Leopard (Mac OSX). Glencoe Software has made its version available for the community: Ice-3.3.1-64.tar.bz2 (sha1=eeebd9865869bb513f2a5274a09aa498418bb4db)
Python 2.4.x or higher installed. Python version from 2.4 to 2.6 (due to backwards incompatibilities in Python 3.0, Django does not currently work with Python 3.0; for more information see the Django Installation page).
The following are optional depending on what services you require:
Python Imaging Library (for OMERO.web and Figure Export functionality only) Packages should be available for your distribution from here
Matplot Lib (for OMERO.web only) Packages should be available for your distribution from here
NumPy Lib (for scripting services) This package may already have been installed as a dependency of Matplot Lib, above, but if not you will need to install it to use scripting services. NumPy is available from here
PyTables Lib (for OMERO.tables) PyTables is available from here
Finally, you need the OMERO server:
- OMERO.server tar.bz2 available from the OMERO downloads page.
Environment Variables
For the prerequisite software to run properly, your PATH, PYTHONPATH, and (DY)LD_LIBRARY_PATH environment variables must be configured. If you installed via a package manager such as rpm, apt-get, or macports, they should be set for you. If not correctly configured or if you installed manually to /opt/Ice-... or a similar location, you will need to set the values yourself.
If you are running a Linux distribution such as Debian or Ubuntu and have used APT to install the prerequisites then the installed software will have been installed to locations in your file system according to the Debian Policy Manual for software packaging. You can explicitly set your environment variables to reflect these install locations by editing the .bashrc file which can be found within your home directory. For example, as of writing, on Debian & Ubuntu the following environment variables should be set:
    export JAVA_HOME=/usr/lib/jvm/java-6-sun
    export JRE_HOME=/usr/lib/jvm/java-6-sun
    export ICE_HOME=/usr/share/Ice-3.3.1
    export POSTGRES_HOME=/usr/lib/postgresql/8.4
    export PYTHONPATH=/usr/lib/pymodules/python2.6:$PYTHONPATH
    export DYLD_LIBRARY_PATH=/usr/share/java:/usr/lib/:$DYLD_LIBRARY_PATH
    export LD_LIBRARY_PATH=/usr/share/java:/usr/lib:$LD_LIBRARY_PATH
    export PATH=$PATH:$JAVA_HOME/bin:$JRE_HOME/bin:$ICE_HOME:$POSTGRES_HOME/bin
Please note that the precise details of these environment variables can change as new versions of software are released.
Furthermore, you can add your OMERO bin directory to your path like so:
    export OMERO_HOME=path-to-your-omero-install-directory
    export PATH=$PATH:$OMERO_HOME/bin
If you are running OMERO on Mac OS X then details of the required environment variables can be found on the install OMERO on Mac walkthrough.
Creating a database as root
Probably the most important step towards having a working server system is having a properly configured database.
On most systems, a "postgres" user will be created which has admin privileges, while the UNIX root user itself does not have admin privileges. Therefore it is necessary to either become the postgres user or use sudo as below:
Create a non-superuser database user and record the name and password. The default name and password for the user is "omero". If you choose other values, you will need to configure the
omero.db.nameandomero.db.passvalues (below).# For PostgreSQL 8.1.x, 8.2.x, 8.3.x, 8.4.x # sudo -u postgres createuser -P -D -R -S <db_username> sudo -u postgres createuser -P -D -R -S omeroCreate a database for OMERO to reside in
# sudo -u postgres createdb -O <db_username> <db_name>
sudo -u postgres createdb -O omero omero
Add the PL/pgSQL language to your database
# sudo -u postgres createlang plpgsql <db_name>
sudo -u postgres createlang plpgsql omero
Check to make sure the database has been created, you have PostgreSQL client authentication correctly set up and the database is owned by the omero user.
$ psql -h localhost -U omero -l
Password for user omero:
        List of databases
   Name    |  Owner   | Encoding
-----------+----------+-----------
 omero     | omero    | SQL_ASCII
 postgres  | postgres | SQL_ASCII
 template0 | postgres | SQL_ASCII
 template1 | postgres | SQL_ASCII
(4 rows)
If you have problems, especially with the last step, take a look at Omero and PostgreSQL since the authentication mechanism is probably not properly configured.
Location for the your OMERO binary repository
Create a directory for the OMERO binary data repository.
/OMEROis the default location and should be used unless you explicitly have a reason not to and know what you are doing.This is not where you want the OMERO application to be installed, it is a seperate directory that OMERO.server will use to store binary data:
You can read more about there OMERO binary repository here.
sudo mkdir /OMEROChange the ownership of the directory.
/OMERO*must either be owned by the user starting the server (it is currently owned by the system root) or that user must have permission to write to the directory. You can find out your username and edit the correct permissions as follows:$ whoami callan $ sudo chown -R callan /OMERO
Installation
Extract the OMERO tarball and note its location. Below it is referred to as:
~/Desktop/omeroOptionally, review
~/Desktop/omero/etc/omero.propertieswhich contains all default settings. You will need to open the file with a text editor. Don't edit the file. Any configuration settings you would like to change can be changed in the next step.Change any settings that are necessary using
bin/omero config, including the name and/or password for the 'omero' database user you chose above or the database name if they are not "omero". (Quotes are only necessary if the value could be misinterpreted by the shell. See link)cd ~/Desktop/omero bin/omero config set omero.db.name 'myDatabase' bin/omero config set omero.db.user 'me' bin/omero config set omero.db.pass 'TopSecret'If you have chosen a non-standard OmeroBinaryRepository location above, be sure to configure the
omero.data.dirproperty.Create the OMERO database initialization script. You will be asked for the version of the script which you would like to generate, where both defaults can be accepted. Finally, you'll be asked to enter and confirm password for your newly created OMERO root user (this should not be the same as your Linux/Mac root user!)
$ cd ~/Desktop/omero
$ bin/omero db script
Please enter omero.db.version [OMERO4.2]:
Please enter omero.db.patch [0]:
Please enter password for new OMERO root user:
Please re-enter password for new OMERO root user:
Saving to ~/Desktop/omero/OMERO4.2__0.sql
Initialize your database with the script.
$ psql -h localhost -U omero omero < OMERO4.2__0.sqlStart the server:
$ bin/omero admin start
Creating var/master
Initializing var/log
Creating var/registry
No descriptor given. Using etc/grid/default.xml
$
OMERO.web and Administration
OMERO.web is the web application component of the OMERO platform and can be started with the lightweight development Web server bound to port 4080 on 127.0.0.1 after you've deployed your OMERO.server instance, as described above. This lightweight web server is written purely in Python and is ideal for developing and testing OMERO.web. However, this server is only designed to run in a local environment, and will not deal with the pressures of a production server used by many people concurrently.
In order to deploy OMERO.web in a production environment such as Apache or IIS please follow the instructions under "Web on Production".
Otherwise please give a try of the internal webserver and setup:
$ bin/omero config set omero.web.application_server development
$ bin/omero web syncmedia
then start/stop by
$ cd ~/Desktop/omero/
$ bin/omero web start/stop
Starting django development webserver...
Validating models...
0 errors found

Django version 1.1.1, using settings 'omeroweb.settings'
Development server is running at http://0.0.0.0:4080/
Quit the server with CONTROL-C.
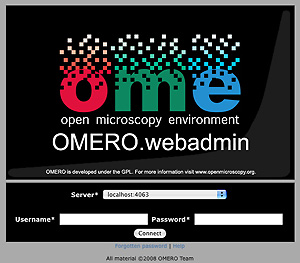
Once you have deployed and started the server you can use your browser to access the OMERO.webadmin administration interface:
Enabling Movie creation from OMERO.
OMERO has the facility to create AVI/MPEG Movies from Images which can be called from Insight. The page OmeroMovie gives details on how to enable them.
OMERO.tables
OMERO.tables can be installed by following the OmeroTables install guide.
Post-installation items
Security
It is now recommended that you read the Security page to get a good idea as to what you need to do to get OMERO clients speaking to your newly installed OMERO.server in accordance with your institution or company's security policy.
Advanced configuration
Once you've gotten the base server running, you may want to try enabling some of the advanced features such as FS or LDAP. If you have Flex data, you may want to watch the HCS configuration screencast. See the Feature list for more advanced features you may want to configure and use. Some other options are briefly mentioned below:
Set session timeout - Duration of inactivity after which a login is required (in seconds):
$ bin/omero config set omero.sessions.timeout 3600000
Update Notification
Your OMERO.server installation will check for updates each time it is started from the Open Microscopy Environment update server. If you wish to disable this functionality you should do so now as outlined on the UpgradeCheck page.
Troubleshooting
My OMERO install doesn't work! What do I do now!?! Examine the Troubleshooting page and if all else fails post a message to our ome-users mailing list discussed on the OmeroCommunity page.
OMERO Diagnostics
If you want help with your server installation, please include the output of the diagnostics command:
    $ cd ~/Desktop/omero/
    $ bin/omero admin diagnostics
    ================================================================================
    OMERO Diagnostics 4.2.1-DEV
    ================================================================================

    Commands:   java -version                  1.6.0     (/usr/bin/java -- 2 others)
    Commands:   python -V                      2.6.6     (/opt/local/bin/python -- 2 others)
    Commands:   icegridnode --version          3.3.1     (/opt/Ice-3.3.1-64/bin/icegridnode)
    Commands:   icegridadmin --version         3.3.1     (/opt/Ice-3.3.1-64/bin/icegridadmin)
    Commands:   psql --version                 8.4.4     (/opt/local/lib/postgresql84/bin/psql)

    Server:     icegridnode                    running
    Server:     Blitz-0                        active (pid = 64639, enabled)
    Server:     DropBox                        inactive (disabled)
    Server:     FileServer                     active (pid = 64641, enabled)
    Server:     Indexer-0                      active (pid = 64642, enabled)
    Server:     MonitorServer                  inactive (disabled)
    Server:     OMERO.Glacier2                 active (pid = 64644, enabled)
    Server:     OMERO.IceStorm                 active (pid = 64645, enabled)
    Server:     Processor-0                    active (pid = 64646, enabled)
    Server:     Repository-1                   error: node `repo' couldn't be reached:
    the node is not active
    Server:     Tables-0                       active (pid = 64647, enabled)
    Server:     TestDropBox                    inactive (enabled)

    Log dir:    /Users/omero/Desktop/omero/var/log exists

    Log files:  Blitz-0.log                    2.0 MB        errors=75   warnings=16
    Log files:  DropBox.log                    1.0 KB        errors=1    warnings=0
    Log files:  FileServer.log                 0.0 KB
    Log files:  Indexer-0.log                  5.0 KB        errors=0    warnings=9
    Log files:  MonitorServer.log              0.0 KB        errors=1    warnings=0
    Log files:  OMEROweb.log                   0.0 KB        errors=0    warnings=1
    Log files:  Processor-0.log                0.0 KB
    Log files:  Tables-0.log                   0.0 KB
    Log files:  TestDropBox.log                n/a
    Log files:  master.err                     0.0 KB
    Log files:  master.out                     0.0 KB
    Log files:  Total size                     2.35 MB

    Parsing Blitz-0.log:[line:18] => Server restarted <=

    Environment:OMERO_HOME=(unset)
    Environment:OMERO_NODE=(unset)
    Environment:OMERO_MASTER=(unset)
    Environment:PATH=...
    Environment:ICE_HOME=/opt/Ice-3.3.1-64
    Environment:LD_LIBRARY_PATH=:/opt/local/lib
    Environment:DYLD_LIBRARY_PATH=/opt/Ice-3.3.1-64/lib:/opt/Ice-3.3.1-64/python:

    OMERO data dir: '/OMERO'    Exists? True    Is writable? True
    OMERO.web status... [NOT STARTED]
